Top Asus ROG Ally Tips to Boost Game Performance and Save Battery Life
You’ve landed the nimble Asus ROG Ally gaming device, haven’t you? Just removed your shiny ROG Ally from its packaging and keen to dive into your favorite game? A few tweaks can unlock even greater potential. This guide will walk you through the process of setting up, tuning, and fast-tracking your experience with the ROG Ally.
Table of Contents
How to Boost Gaming Performance
Update everything
Your first line of action is to stay on top of your device updates. Regular checks in apps like MyAsus, Armory Crate, Windows Updates, and AMD Adrenaline are critical to maintaining top-tier performance.
Why? These updates often come with bug fixes and enhancements, especially within the initial month. The game you’re struggling to play today could be running smoothly tomorrow thanks to a single update.
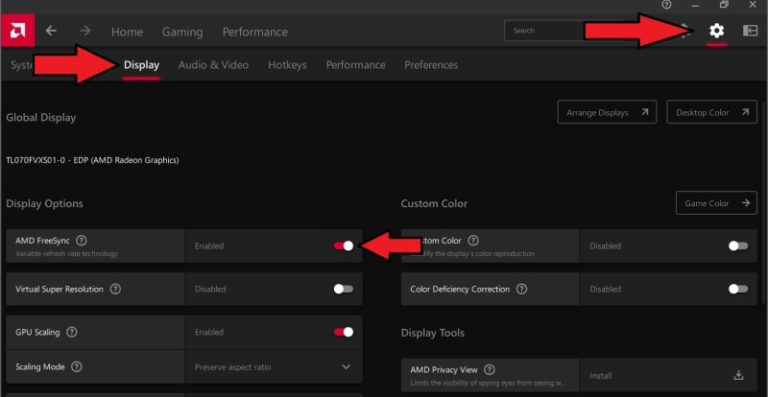
Turn on AMD RSR
Unlike FSR, RSR adopts a slightly different approach but ultimately seeks to achieve the same goal: it renders your games at a decreased resolution, then elevates them to match your display’s native resolution.
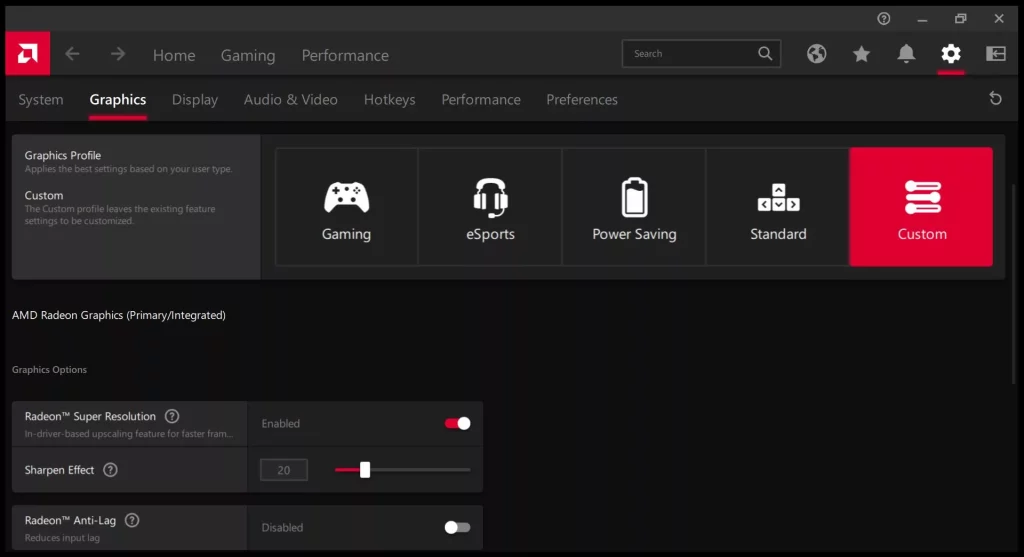
If your games don’t support FSR, you can use another option, Radeon Super Resolution or RSR.
To activate RSR, start by adjusting the resolution of the game in question to a lower setting.
- Open the game, head over to its Display or Graphics settings, configure the game to function in Full-Screen mode, and reduce the resolution to 1280×720.
- Exit the game, head into the Command Center, and switch on AMD RSR.
- Once you restart the game, you’ll find that even though the game’s resolution indicates 720p, the AMD driver will upscale it to 1080p, providing enhanced visuals and increased performance.
Allocate VRAM
When you encounter a game that heavily depends on VRAM and experiences stuttering during play or fails to launch due to insufficient VRAM, it may be necessary to reallocate more shared memory of the Ally towards VRAM.

- Open Armoury Crate
- Select Settings > Operating Mode > GPU Settings.
- Find the drop-down menu adjacent to Memory Assigned to GPU, and modify it to the desired value.
By default, the Ally assigns 4 GB of memory to VRAM, which can be adjusted from 1 GB to 8 GB.
Switch to Turbo mode and docking
The ROG Ally introduces an exciting feature known as the 25W Turbo mode, designed to boost the power of your device, thus enhancing your frame rates for a smoother gaming experience. Activating Turbo mode is as easy as pushing the Control Center button situated on Ally’s left side and adjusting the Operating Mode to Turbo.
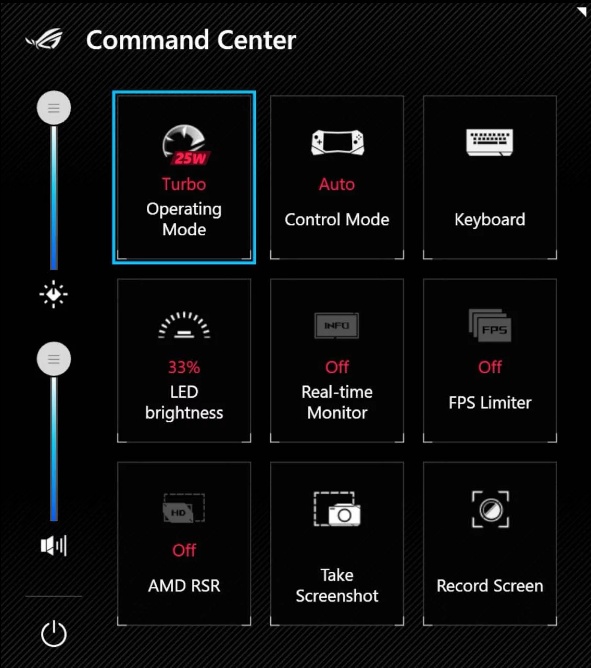
Suppose you wish to take your gaming experience a notch higher. In that case, you have the option of connecting your device to a power source, thus further enhancing Turbo mode’s power usage. This setup escalates to a whopping 30W, allowing a few additional frames per second for an even more seamless gaming experience.
For the more technically inclined users with a penchant for customization, the ROG Ally caters to you too, offering a Manual Mode. This feature affords you complete control over APU power management and fan speed. By accessing the Armoury Crate, you can navigate to the Settings tab, locate the Operating Mode option, and select Manual Mode from the subsequent list. Here, you’re greeted by a variety of sliders and graphs that allow you to fine-tune your gaming experience as you deem fit.
Disable Windows’ Memory Integrity and VMP
The reason behind your computer’s sluggish performance or lower frames-per-second (FPS) could be certain services that come as a default setting on the ROG Ally. An easy remedy is to disable these services, which can lead to better gaming performance.
Disable the Memory Integrity option
To do this, initiate the process by clicking on ‘Start’. Input ‘Core Isolation’ into the taskbar search.

From the search results, select ‘Core Isolation’, which will lead you to the Windows security application.
Within the ‘Core Isolation’ screen, ensure the ‘Memory Integrity’ toggle is off.
This change might necessitate a device restart.
Disable the Virtual Machine Platform
Similarly, another service that can potentially inhibit your gaming experience is the Virtual Machine Platform (VMP). To turn it off, click on ‘Start’ and search for ‘Windows features’.
From the search results, click on ‘Turn Windows features on or off’. This action will open a new window displaying various Windows features.

Locate ‘Virtual Machine Platform’ and make sure it’s not selected.
After confirming this, click on ‘OK’. Like the previous action, this might also require a restart of your device.
How to Save the Battery Life
General settings for better battery life
If you find that the battery life of your ROG Ally is suffering, it may be due to high-performance settings. While it’s tempting to crank up the settings to make the most of the 1080p screen with its 120Hz refresh rate, doing so can reduce battery life.
Try these settings if you want to extend Ally’s battery:
- Turn on AMD RSR
- Set the operating mode to 15-watt performance mode
- Change the resolution to 720p (for both the device and in-game)
- Set the refresh rate to 60Hz
These settings can be found on the Command Center.
Activate Battery Care Mode
By activating the Battery Care Mode, your maximum charge potential is restricted to 80%.
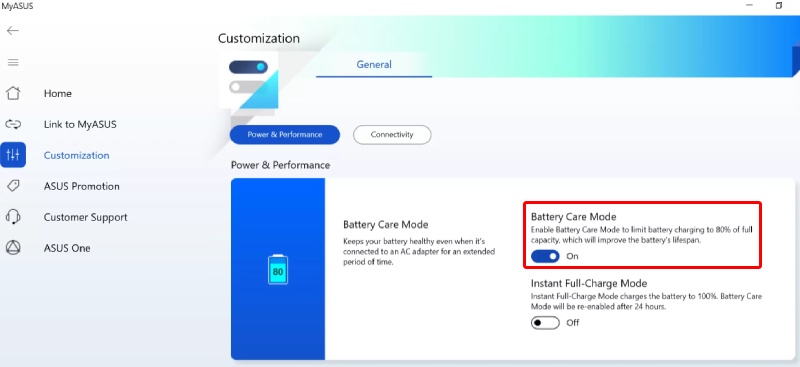
Visit the Customization section in the MyASUS app and activate Battery Care Mode. This may shorten your immediate battery life as it won’t be fully charged, but it sets the stage for prolonged battery vitality in the years to come.
And for those power-hungry gaming sessions, the Instant Full-Charge Mode is at your disposal, topping up your battery to full capacity for a 24-hour period.
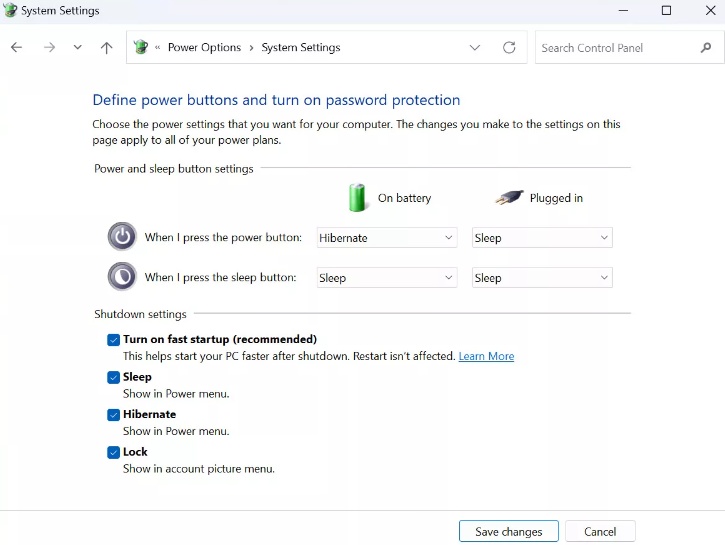
Turn on Hibernate
Hibernate is a power-saving feature in Windows operating systems, including Windows 11, designed to conserve battery life on laptops and other portable devices.
It allows the computer to save its current state—open applications and documents—to the hard disk before turning it off. This way, the user can return to their work exactly where they left off once the computer is powered back on, even if it has been disconnected from power.
It can be applied to the ROG Ally as well. Hibernate mode is an efficient way to save power on your Ally when it’s not in operation.
To enable this, delve into Windows’ Control Panel, then proceed to Hardware and Sound > Power Options > System Settings. Alter the “When I press the power button” option to “Hibernate”. From this point forward, a straightforward button press will place your Ally into Hibernate mode.
Use Silent mode to save battery
ROG Ally comes equipped with different operational styles that influence power usage, fan rapidity, and overall device efficacy. Three modes are at your disposal – Silent, Performance, and Turbo. Each offers a unique power specification for the Ryzen Z1 Extreme APU: Silent Mode yields 10W, Performance Mode generates 15W, and Turbo Mode outputs 25W of power.
To save the battery, it is better to keep the mode Silent. However, it won’t run your games at maximum graphic quality.
Lower the screen’s brightness
When we talk about power consumption in mobile devices, one must not ignore the giant share taken by the screen’s light-emitting diodes (LEDs). For instance, consider Ally, a device lauded for its extreme brightness level of 500 nits. Although brilliant for outdoor usage, when you’re cozy indoors, such intensity might not be essential.
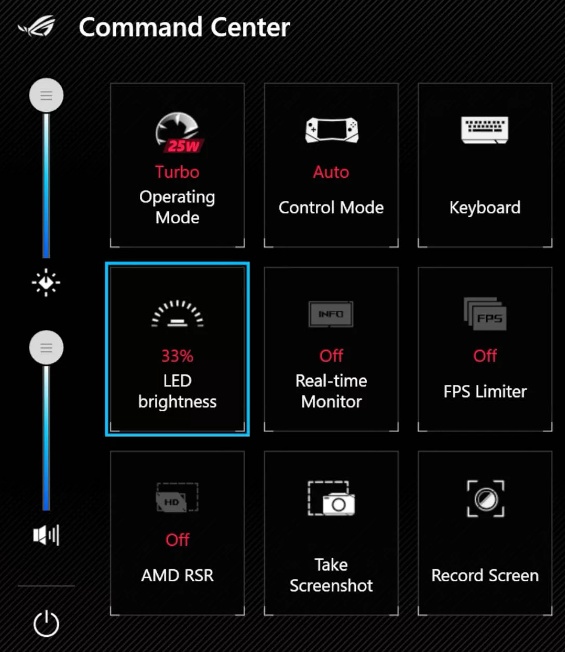
The resolution? Easy, go ahead and hit the Command Center button, revealing an option to manage your device’s brightness. Here, a vertical slider awaits you on the left side of the screen. Drag it down to diminish the overall brightness, which will subsequently extend your battery playtime. And, there’s another battery-conserving trick – disabling the RGB lighting.
ROG Ally Tips to Beginners
Update Armoury Crate, drivers, Windows, and game stores
Regardless of how long you’ve owned your ROG Ally, staying updated with the latest software is key.
As the Ally operates on Windows 11, regular checks for updates are a must:
- Hit the Start button, and in the search bar type ‘updates’
- Navigate to “check for updates” in the System settings
- Download and install any newly available updates
Also, you should not forget to update Asus Armoury Crate SE:
- There’s a button with the ROG logo on the ROG Ally’s right side, press it. This action brings up Armoury Crate
- Next, tap Content at the screen’s topmost part
- Look for updates, download, and implement any updates you find
You should also update your games depending on which store you bought them from.
Rmember useful shortcuts
The ROG Ally has several handy shortcuts that can make navigation easier, especially during gameplay. The device has two macro buttons on the back, and pressing these in combination with other buttons can perform quick actions. Here are a few examples:
- Macro + A: Take a screenshot
- Macro + B: Show Windows Notification Center
- Macro + X: Projection mode
- Macro + Y: Begin Recording
- Macro + D-pad Up: Show virtual keyboard
- Macro + D-pad Down: Open Task Manager
- Macro + D-pad Left: Show Desktop
- Macro + D-pad Right: Task Viewer
- Triangle button (on the left side): Command Center button. Inside Armoury Crate, you can adjust which buttons show up in the Command Center, easing access to different functions.
- Hold the Command Center button: Invoke Ctrl+Alt+Del. Want a quick shutdown, user swap, or a glimpse at the Task Manager? No need to downsize Armoury Crate and trawl through the start menu. Just give the Command Center button a three-second press, and the Ctrl+Alt+Delete interface will emerge.
Utilize the on-screen keyboard
The ROG Ally also has a virtual keyboard that can be accessed via the Command Center. The on-screen keyboard proves extremely useful, especially when inputting passwords and the keyboard fails to appear.
With the keyboard active, you can modify its screen location or switch between modes. The “traditional” mode resonates with us, mimicking a regular keyboard with the usual buttons.
From there, you can use typical Windows shortcuts like ALT+Tab, and CTRL+Shift+Del, among others.
Set up a Bluetooth mouse and keyboard
The ROG Ally allows you to connect Bluetooth devices for easier controls for certain games or productivity tasks.
To do this, press the Windows start button, type to search for Bluetooth settings, tap to open them, tap on “Add device” and let it search.
In the meantime, put your device into Bluetooth pairing mode and connect your device when it appears.
Enable Fingerprint login
Were you aware that the ROG Ally is compatible with Windows Hello? This feature permits you to utilize your fingerprint as a unique key to access your Ally.
While Windows provides the option to create a pin for logging in, there’s also the flexibility to configure a fingerprint scan on the power button as an alternative login method.
When you carry your Ally in public, it’s beneficial to safeguard it to prevent any unexpected incidents.
Streamline SSD performance with a thorough trim
Your new ASUS ROG Ally will benefit from a mild SSD trim. Initially, you might consider reaching for a petite hacksaw and a compact screwdriver. After acknowledging the jest, discard those and bring out your ROG Ally instead.
- Activate the start menu
- Look up ‘Disk Cleanup‘ and initiate it
- Run ‘Clean Up System Files‘ after ticking all the necessary options
- Revisit the start menu and look for Defragment and Optimise Drives
- Select C: Drive and click ‘Optimise‘
Extend your storage
The ROG Ally has a big storage space of 512GB, which is a lot. Asus says that it’s easy to add more storage if you need it. But, because games these days need a lot of space, you might run out of room quickly.
No worries, as the device allows for an upgrade with a microSD card. Procure one, and you’ll be able to augment the space for your games. While the speed may not match the in-built NVMe SSD, it’s adequate for game loading.
Don’t worry though, you can buy a microSD card to add more space for your games. It might not be as fast as the built-in NVMe SSD, but it’s good enough for loading games.


Disabling Core Isolation also seems to disable using the finger print sensor on ROG Ally. Any way to enable finger print login with this kept off?
Have you checked to update your ROG Ally? It might be due to driver or BIOS updates. You can try removing old finger print then adding it back.