ROG Ally’s Joystick Deadzone Issue and Fixes
Oh, what a bummer! You’ve got the beastly ROG Ally but can’t land those precise hits in your favorite first-person shooter games. Don’t worry! It’s not you; it’s that annoying joystick deadzone issue. Let’s take a quick look at the issue and implement a temporary fix.
Table of Contents
A Quick Peek at the Deadzone Issue
Several game reviewers and product examiners appear to overlook the problem related to the gamepad stick’s insensitive regions, especially when dealing with games where meticulous stick operation isn’t needed.
For the uninitiated, a joystick deadzone is a sort of no man’s land right at the center of your joystick. Any movement in this area? Pfft! Your game might as well be blindfolded. And with the ROG Ally’s deadzone being reported as large as a whopping 20%, it’s no wonder you’re missing those crucial shots.
Your frustration is echoed across Reddit and Facebook by scores of other ROG Ally users. But, hold on a minute! ASUS is not leaving you high and dry. They’ve taken note of this issue, and a fix is underway.
In the mean time, you can try one of these solutions to fix the deadzone issue.
How to Fix the ROG Ally Deadzone
Adjust Steam’s anti-deadzone
If you are playing games on Steam, you can set the Output Anti-deadzone and Antri-deadzone Buffer depending on the game and how bad your Ally’s deadzone issue is.
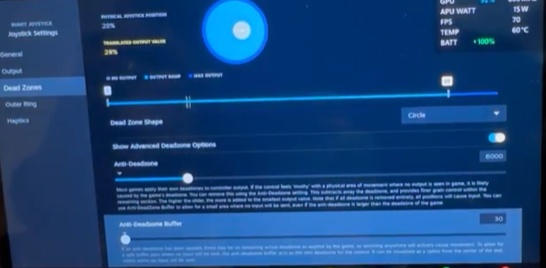
An example of Hitman 3 settings:
- Left stick:
- Output Anti-deadzone: 5000
- Antri-deadzone Buffer: 0
- Right stick:
- Output Anti-deadzone: 7500
- Antri-deadzone Buffer: 30
Use vJoy
Here is a cool workaround from u/RXavier91 that can help you claim back your gaming prowess.
- Install vJoy from GitHub. Yep, it’s as straightforward as it sounds. Head over to its official GitHub page, download, and install it. Upon completion, open the “Configure vJoy” application and change the number of buttons to 10 and set POVs to 1.
- Next, we’re installing the Joystick Gremlin.
- Once Joystick Gremlin is cozy in your system, open it up. Now, it’s action time! Click on “Actions”, then “Create 1:1 Mapping”. You’re setting the stage here.
- Notice that button that looks a lot like an Xbox controller. Give it a click. A green glow means you’ve hit the bullseye!
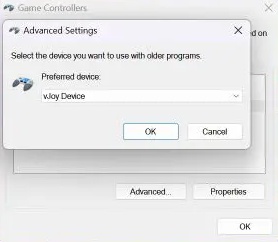
- Almost there. Hit the Start button and search for “Set up USB game controllers”. Time to get serious and go Advanced. Your preferred device? That’s the “vJoy Device”.